Quick Guide: Passenger App
The TaxiCaller Passenger App Quick Guide
The TaxiCaller Passenger App is available for free in Google Play and App Store. Start by downloading it and opening it on your phone.
Table of Contents
A. Create an Account in the App
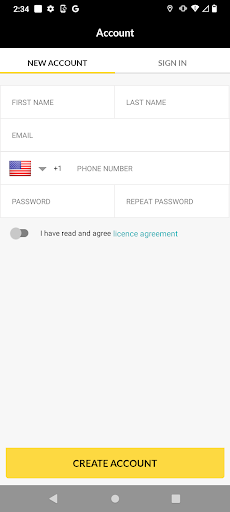
- Tap “New Account” at the top left and fill out the following fields:
- Create a password for your account.
- Read and agree to the license agreement.
- Tap the yellow “Create Account” button at the bottom.
- You will automatically be logged in and you are now ready to book a ride!
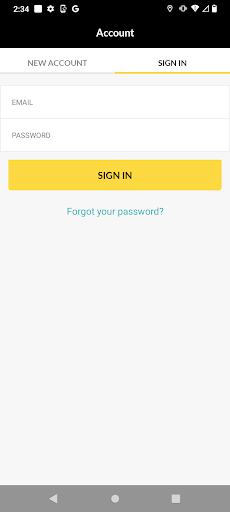
B. How to Make a Booking
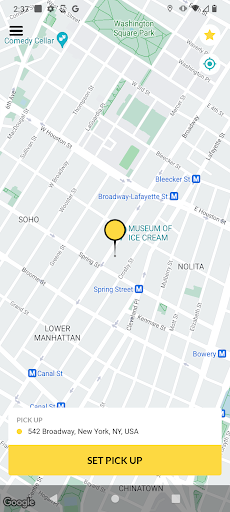
- Pick-Up Point: Write the address of the pick-up point on the bottom of the screen under “PICK UP” or drag the yellow pin on the map to the desired location and the system will autocomplete the address.
- Set Pick-Up: Once the pick-up location has been chosen, press the yellow “SET PICK UP” button on the bottom of the screen.
- Hailing: You can always choose to hail the vehicle that you want just by tapping its icon on the map. Once you tap on the vehicle, you will see the name of the taxi company, type of vehicle, driver name, and the license plate of the vehicle.
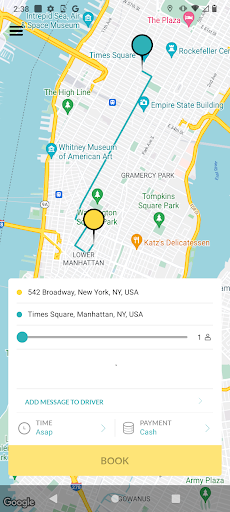
- Destination: Next you will set the drop-off address. At the bottom of the screen under “DROP OFF” type in your destination address and tap the yellow “SET DROP OFF” button.
- Passengers: Choose the number of passengers by moving the slider under the destination address.
- Vehicle Type/Taxi Company: Tap the yellow taxi icon to choose the taxi company and vehicle type that you would like to book. You can even add a message to the driver such as the number of bags you have or any other important information.
- Date & Time: Select whether you want to book a taxi right away (asap) or reserve one for a specific time and date.
- Payment Method: Select the type of payment from the taxi company’s available methods.
- Book: Once the information is correct, click the yellow “BOOK” button to book your ride.
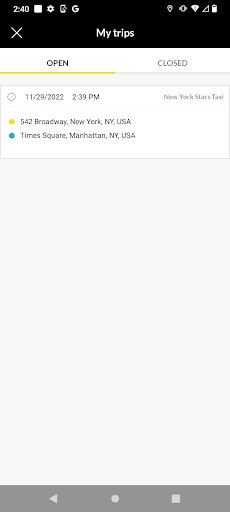
C. Check your Bookings
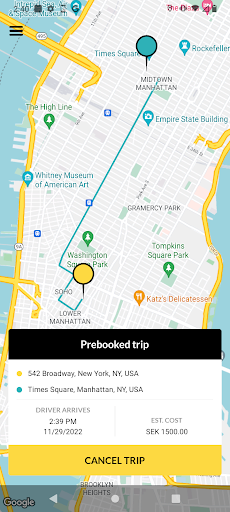
- When you book, the app confirms that the booking has been made and shows all the details of your ride, like the price and the assigned driver and vehicle.
- Under “My Trips,” the app also saves the history of all your bookings so you can see all of the rides that you have booked from your account.
- Your booked trips that have not been taken yet will be shown under “Open” and will show all of the details of your future ride(s).
- Your previous rides will be shown under “Closed” along with information including the trip duration, price paid, the vehicle and driver you rode with, and the date and time of the ride.